Connect with us

Technology

What Is Scraping | About Price & Web Scraping Tools

Published

on

web scraping software

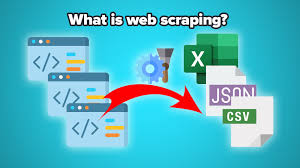
Are you tired of manually copying and pasting data from websites? Do you want to know how businesses gather large amounts of data quickly and efficiently? Enter web scraping, the process of extracting data from websites using specialized tools. In this blog post, we’ll delve into what scraping is, its benefits for businesses, and explore some popular price and web scraping tools. So buckle up as we take a deep dive into the world of web scraping!

What is scraping?

Scraping is the process of extracting data from a web page or other online source. Scraping can be done manually, but it is often done using a tool that automates the process.

There are many reasons why someone might want to scrape data from a web page or other online source. They may want to collect data for research purposes, to monitor prices on a website, or to track changes in content on a website over time.

There are many different tools available for scraping data from websites. Some of these tools are designed for specific purposes, while others are more general purpose.

What are the benefits of scraping?

When it comes to web scraping tools, there are a number of benefits that make this technique worth considering. First and foremost, web scraping can help you gather data at a much faster pace than traditional methods. This is especially useful if you need to gather large amounts of data in a short period of time.

Another benefit of web scraping is that it allows you to automate repetitive tasks. For instance, if you need to gather data from the same website on a daily basis, you can set up a scraper to do the job for you. This can save you a lot of time and effort in the long run.

Finally, web scraping can also be used to bypass paywalls or other restrictions that might be in place on certain websites. By using a scraper, you can access the data that you need without having to worry about any barriers.

What are some of the best scraping tools?

There are a number of great scraping tools available to help you extract data from websites. Some of the best include:

-Web Scraping API: This web scraping software allows you to turn web pages into data with the click of a button.

-Webhose.io: Webhose.io provides access to structured and real-time data from hundreds of thousands of sources, including news, blogs, and forums.

-Octoparse: Octoparse is a free web scraping tool that makes it easy to grab data from websites without having to write any code.

-Scrapy: Scrapy is an open source web scraping framework written in Python that allows you to easily extract data from websites.

How to use scrapers effectively

There are a few key things to keep in mind when using scrapers effectively:

1. Make sure your scraper is well-designed and robust. A good scraper will be able to handle a large amount of data without crashing or losing data.

2. Choose your scraping target wisely. Not all websites are created equal – some are much easier to scrape than others. Do your research beforehand to make sure you’re targeting a website that can be easily scraped.

3. Use the right tools for the job. There are a variety of scraping tools available, so it’s important to choose the one that best suits your needs. For example, if you’re looking to scrape data from a website that has a lot of AJAX, you’ll need a tool that can handle that kind of data.

4. Don’t be afraid to experiment. Scraping can be a bit of an art, so don’t be afraid to experiment with different techniques and tools until you find what works best for you.

What are the best scraping tools?

There are a few different web scraping software on the market. Some are better than others. Here is a list of some of the best scraping tools:

1. import.io
2. Scraper API
3. Octoparse
4. Kimono Labs
5. ParseHub
6. Mozenda
7. Data Miner

Scraping tutorials

There are a number of tutorials available online that can help you get started with web scraping. These tutorials provide step-by-step instructions on how to use various web scraping tools to extract data from websites.

Some of the most popular web scraping tutorials include:

• How to Use Web Scraping Tools to Extract Data from Websites

• Introduction to web scraping software

• An Overview of Web Scraping Techniques

• Getting Started with Web Scraping

price & web scraping tools.”

The different types of scraping

There are many different types of scraping. Some common methods are:

-Using a web browser to save the contents of a web page to your local hard drive. This is sometimes also referred to as screen scraping or web harvesting.

-Downloading a web page’s content using a command line tool such as wget or cURL.

-Using a dedicated web scraping tool or service. There are many different options available, both free and paid.

-Writing your own custom code to extract data from websites. This is usually only necessary if you need to scrape data that is not easily accessible through one of the other methods.

How to scrape effectively

There are a few key things to keep in mind when scrape effectively:

1. Know your goal. What information are you trying to collect? What format do you need it in? Answering these questions will help you determine the best approach to take.

2. Choose the right tool for the job. There are a variety of web scraping tools available, so make sure to select one that fits your needs.

3. Follow the website’s rules and guidelines. Most websites have terms of service that you should be aware of before starting to scrape data.

4. Be prepared to deal with errors and missing data. Not every scraped page is going to be perfect, so it’s important to have a plan for dealing with missing or incorrect data points.

conclusion

In conclusion, scraping is a process of extracting data from sources that are not intended to be accessed or used in the way that you are using them. Price scraping is a particular type of web scraping that refers to the process of extracting pricing information from websites. There are many different tools available to help you with web scraping, ranging from simple online tools to more complex software programs.

Visit home

Continue Reading
Click to comment

Leave a Reply

Your email address will not be published. Required fields are marked *

Technology

Codeless Automation Testing- All you need to know

Published

on

With the growing complexities of software applications, the need for no-code test automation has risen significantly. Additionally, the dynamic consumer demands make it crucial for app-developing brands to deliver exceptional user experiences to ensure good customer loyalty and brand reputation. Of the major automation tools, several enterprises choose Appium as their primary for their mobile app automation owing to multiple competitive advantages. It’s open-source and cost-effective, which helps not only large enterprises but also growing businesses adopt this tool. However, gaining expertise in using the tool is often time-consuming and complex. Codeless or no-code automated testing has emerged as a game-changing approach that addresses this challenge. 

No-code test automation offers unprecedented efficiency, accessibility, and collaboration. By eliminating the need for extensive programming knowledge, it empowers testers of all technical backgrounds to actively participate in the automation journey.

Today, no-code test automation tools have gained significant popularity in the industry. The demand for these tools has increased as organizations strive to accelerate their testing processes and involve non-technical team members in no-code automated testing.

What is Codeless Test Automation?

Codeless test automation creates automated tests without writing a single line of code. It utilizes a graphical user interface with pre-built functions and logic to define test scenarios, making it accessible to individuals who may not have extensive programming knowledge. This approach is gaining traction as it democratizes test automation, allowing testers and business analysts to contribute directly without a steep learning curve.

The Difference Between Code-Based and Codeless Automation

Understanding the distinction between code-based and codeless automation is crucial:

  • Code-Based Automation: Requires testers to write scripts in a programming language. This method offers flexibility and control but demands technical expertise and is time-consuming.
  • Codeless Automation: Allows testers to create tests using a visual interface. This method is faster and more accessible but may offer less flexibility in complex test scenarios.

Benefits of Codeless Testing

Codeless test automation, particularly when implemented with solutions like HeadSpin, offers numerous advantages:

  • Accessibility: Enables non-programmers to design and execute tests, broadening the testing team’s capabilities.
  • Efficiency: Reduces the time needed to create and maintain tests, accelerating the testing cycle.
  • Cost-Effectiveness: Lowers the barrier to entry for automation, potentially reducing the costs associated with training and hiring specialized personnel.
  • Scalability: Facilitates easy updates and test modifications, supporting agile development practices.

By incorporating codeless test automation, teams can focus more on test strategy and quality assurance rather than the intricacies of coding.

This article is originally published on:

https://www.headspin.io/blog/codeless-appium-test-automation-with-headspin

Continue Reading

Technology

Mastering Continuous Testing: A Definitive Guide to Seamless Software Delivery

Published

on

Mastering Continuous Testing

Once an overlooked aspect, continuous testing has become indispensable for enterprises striving to accelerate application delivery and reduce business impacts. According to a Statista report, 31.3% of global enterprises have embraced continuous integration and deployment within their DevOps, signaling a pervasive trend toward hastening release cycles.

In this dynamic landscape, continuous testing emerges as the linchpin, empowering organizations to accelerate software delivery, ensure high-quality digital experiences across diverse platforms, and meet evolving customer demands. The infusion of continuous integration and deployment offers the much-needed flexibility to seamlessly integrate automated testing into development stages, enabling early error identification and a substantial enhancement in the quality of each software release candidate.

As we delve into what continuous testing is, underscore its significance, explore best practices, and elucidate the pivotal role of HeadSpin in its implementation, we invite you to navigate this informative blog to gain valuable insights into this transformative approach.

Understanding Continuous Testing: What is It?

In traditional testing approaches, projects often involve handovers between different teams, leading to inefficiencies in feedback and coordination. The crux of an effective DevOps strategy lies in bridging the gap between swift software delivery and reliable user experiences. This is precisely where continuous testing is pivotal in the software development lifecycle.

Continuous testing operates as a linchpin in the software delivery pipeline, offering instant feedback on business risks and identifying software malfunctions promptly. Continuous testing tools take center stage in today’s fast-paced business landscape, where rapid development and timely software delivery are paramount. These tools enhance code quality and circumvent costly bottlenecks, expediting the entire software development process.

Enterprises now view continuous testing as an automated and secure means to ensure the security and effectiveness of their applications in the intricacies of a dynamic and fast-paced development environment. This shift underscores the growing recognition of continuous testing as essential for delivering robust and efficient software solutions.

Embracing continuous testing has become a strategic imperative for enterprises striving to outpace their competitors. In the current landscape, adopting the right test automation tools and seamless integration is essential for building an effective and efficient delivery pipeline.

At the forefront of this evolution is HeadSpin, whose core product proves instrumental for companies across diverse industries looking to implement continuous testing. The HeadSpin Platform offers a versatile solution, addressing various testing needs—from functional testing to performance and regression testing. Through HeadSpin’s continuous testing model, organizations stand to significantly reduce costs, accelerate time-to-market, and, most importantly, channel their focus toward delivering enhanced customer value.

This article originally published by: https://www.headspin.io/blog/continuous-testing-a-complete-guide

Continue Reading

Technology

How Can You Maximize Efficiency with Inspect Element on iPhone?

Published

on

Inspect Element on iPhone

As web developers, we often encounter situations where we need to inspect and analyze the elements of a webpage. Inspecting elements allows us to understand their structure, styles, and functionality, enabling us to troubleshoot issues, debug code, and improve the overall user experience. While inspecting elements on desktop browsers is a well-known process, doing so on mobile devices like iPhones may seem more challenging.

This comprehensive guide will provide you with a tutorial on enabling, exploring, and troubleshooting the Inspect Element feature on your iPhone. Furthermore, If you’re also curious about how to inspect on a Mac, we will explore how HeadSpin, a powerful mobile testing Platform, provides a seamless solution for inspecting elements on iPhone devices, empowering you to tackle web development on iOS confidently.

Understanding the Concept of Inspecting Elements

The Inspect Element on Mac feature is a powerful tool for developers and designers, as well as an invaluable resource for troubleshooting errors or glitches on a website. This feature allows you to access and modify website code, view the HTML, CSS, and JavaScript of a web page, and make changes to the code of a website quickly.

Inspect Element is available in popular web browsers like Chrome, Firefox, and Safari. If you’re wondering how to inspect on a Mac, it is easy to enable; all you need to do is open your browser’s Developer Tools by right-clicking any element on the page (or using the built-in shortcut keys) and selecting “Inspect Element.” Once enabled, you can begin exploring the source code of any web page.

When inspecting elements with Inspect Element, it is important to note that any changes you make will only be visible within the Developer Tools window; they will only be applied live to the page once those changes are saved or exported. This makes it safe to experiment without worrying about breaking something permanently. Additionally, when troubleshooting errors or glitches on a website with Inspect Element, it’s important to note that not all errors are obvious from looking at the source code – some issues might require further investigation into other areas, such as server logs or 3rd party services used by the site.

Exploring Various Approaches to Inspect Elements on iPhone Devices

While inspecting elements on desktop browsers is relatively straightforward, doing so on iPhones requires specific techniques and tools. For those just starting with web development, using Inspect Element provides valuable insight into how websites are put together before tackling more complex projects.

This article is originally published by https://www.headspin.io/blog/tips-and-tricks-for-using-inspect-element-on-ios

Continue Reading

Trending

Copyright © 2022 webinvogue.com. All rights reserved.