Connect with us

Technology

10 Tricks to a Successful POC CNA Login

Published

on

Are you a certified nursing assistant (CNA) looking to take your skills to the next level? Look no further than POC CNA – Point of Care Certified Nursing Assistant. But before you can access all the amazing resources and benefits that POC CNA has to offer, you need to successfully login to your account. Don’t fret – we’ve got 10 tricks up our sleeve for ensuring a smooth and successful POC CNA login experience. From troubleshooting common problems to creating an effective login strategy, read on for all the tips and tricks you need to master the art of logging in like a pro.

Get your CNA Login ready

Before you embark on the journey of accessing POC CNA, it’s important to ensure that your CNA login is ready to go. The first step in this process is to create a strong and secure password. Choose a combination of letters, numbers, and symbols that would be difficult for anyone else to guess.

Another important consideration is whether you have all the necessary information handy before attempting your login. This includes your username or email address associated with your account as well as any other required personal identification details such as date of birth or social security number.

Make sure that you are using a compatible web browser when logging into POC CNA. As technology evolves rapidly, it’s best practice always to use an up-to-date version of Chrome or Firefox.

Double-check that your internet connection is stable before beginning the login process. A slow or inconsistent connection can cause delays and potentially even errors during the login attempt.

By taking these simple steps ahead of time, you’ll be setting yourself up for success with a smooth and hassle-free POC CNA login experience.

Understand the basics of a POC CNA login

If you’re new to the world of POC CNA login, there are a few basics that you’ll need to understand. First and foremost, POC stands for Point of Care, which refers to the location where healthcare providers deliver services directly to patients. As a CNA or Certified Nursing Assistant, your job will be to assist nurses in providing care at these points.

To access your account on the system’s web portal, you’ll need a username and password provided by your employer. Once logged in, you can view patient records and enter data about their care into the system.

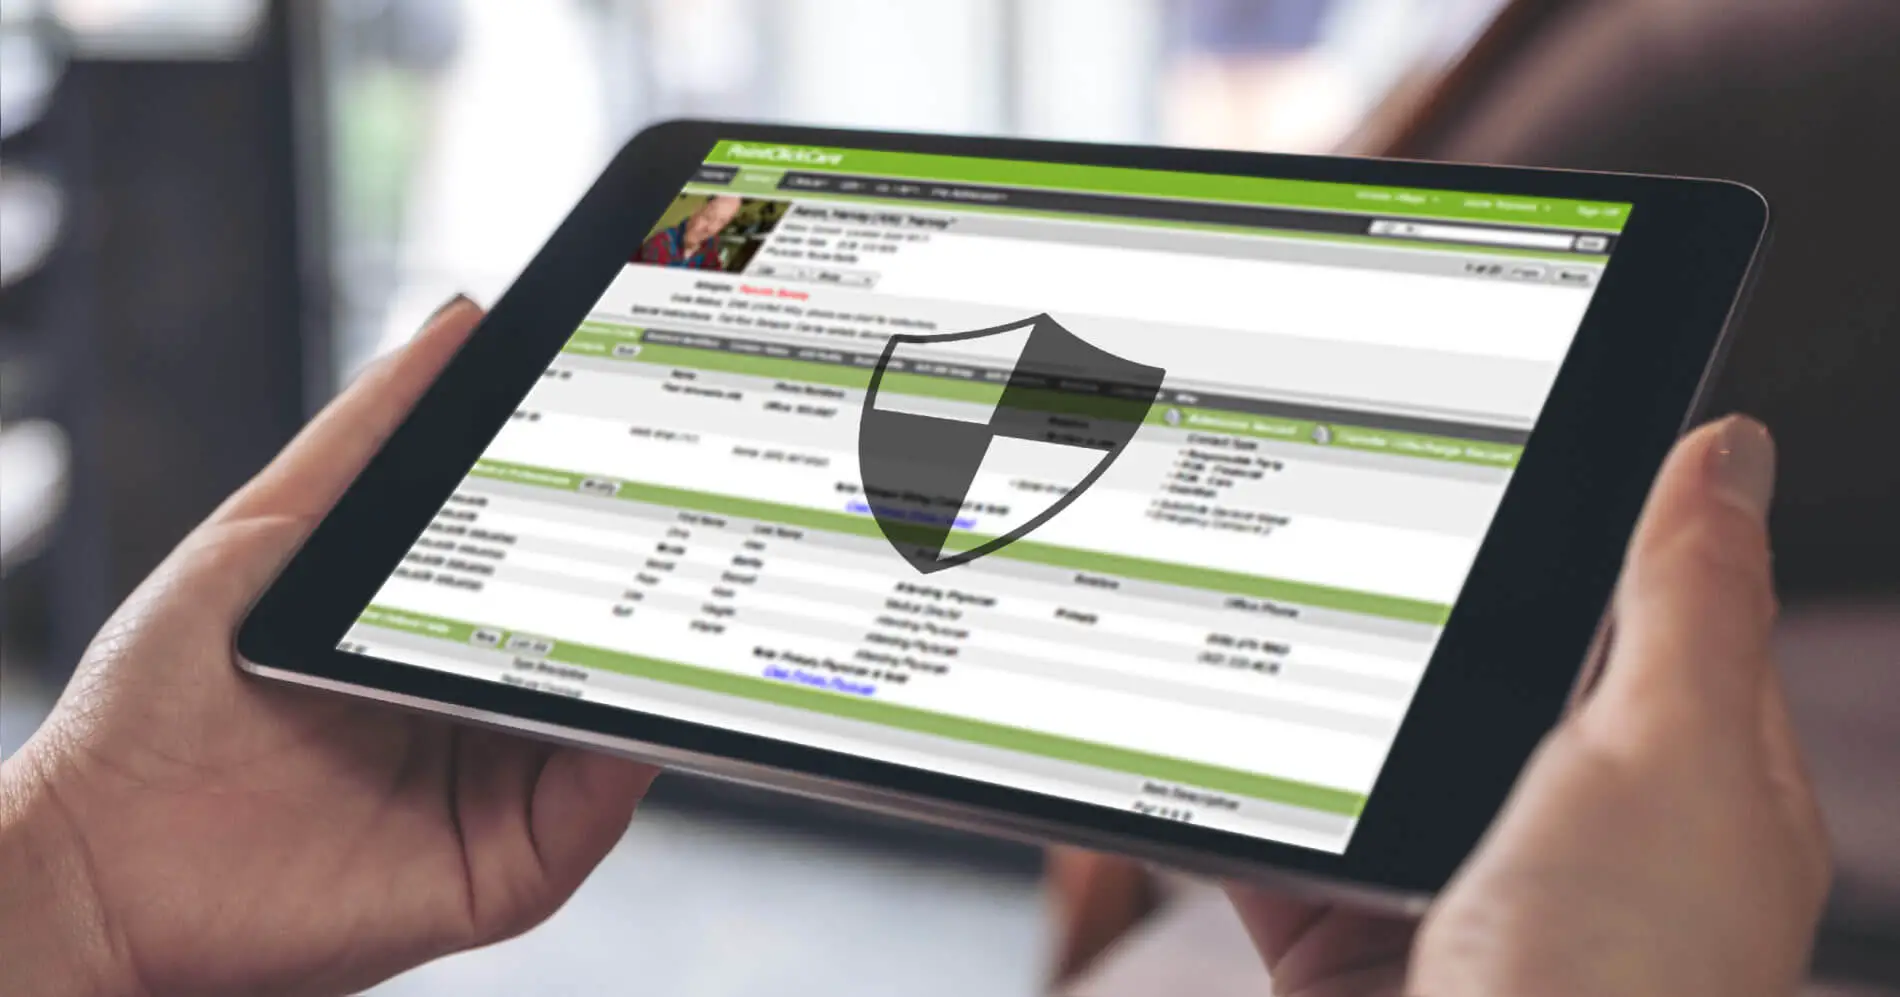
It’s important to note that POC systems require strict adherence to privacy laws such as HIPAA (Health Insurance Portability and Accountability Act). As such, it is essential that only authorized personnel have access to patient records. You should never share your login details with anyone who is not authorized.

In addition, always remember that accessing patient information without proper authorization can lead to legal consequences for both yourself and your employer. It’s crucial that you take all necessary steps to protect sensitive information while using the POC CNA login system.

By understanding these basic concepts around POC CNA login procedures and protocols ,you’ll be well-equipped for success when logging in!

Tips for logging in to your account

Logging in to your POC CNA account may seem like a simple task, but it can sometimes be challenging. Here are some tips to ensure you have a successful login experience.

Firstly, make sure you have the correct website address and login credentials for your account. Double-checking this information will save you time and frustration later on.

Next, clear your browser cache and cookies before attempting to log in. This helps eliminate any technical issues that may arise due to stored data from previous sessions.

If you’re still having trouble logging in, try using a different browser or device. Sometimes issues can occur due to compatibility problems between certain devices and browsers.

Another tip is to ensure that you have a stable internet connection before attempting to log in. Slow or unstable internet connections can cause login errors or delays.

If all else fails, don’t hesitate to contact customer support for assistance with your login issue. They are there to help answer any questions or concerns about accessing your POC CNA account.

Following these tips will help ensure a smooth and stress-free login experience so that you can focus on what really matters – providing excellent care as a certified nursing assistant!

How to troubleshoot common problems with your POC CNA login

If you are having trouble logging in to your POC CNA account, don’t worry! There are some common problems that can arise when trying to access your account. Here are some troubleshooting tips:

Firstly, make sure you have entered the correct username and password. It may sound simple, but it’s easy to overlook a typo or mistake.

If you’re still unable to log in, try resetting your password by clicking on the “forgot password” link. This will prompt you to enter your email address associated with your account and send a reset link.

Another possible issue could be a slow internet connection or outdated browser. Make sure you have a strong Wi-Fi signal and try clearing cache and cookies from your browser settings.

Sometimes an error message may appear if there is maintenance going on with the website or server issues. In this case, wait for some time before trying again.

If none of these solutions work, contact customer support for further assistance. They should be able to help troubleshoot any technical difficulties with accessing your POC CNA account so that you can log in successfully every time!

Tips for a Successful POC CNA Login

Logging into your POC CNA account can sometimes be a daunting experience, especially if you are new to the system. However, with the right approach and mindset, it is possible to have a successful login process every time.

One tip for a successful POC CNA login is to ensure that you have all the necessary information handy before attempting to log in. This includes your username and password as well as any other relevant details required for authentication purposes.

Another important aspect of logging in successfully is ensuring that your internet connection is stable and reliable. A weak or intermittent connection may cause delays or even prevent you from accessing your account altogether.

It’s also essential to make sure that you’re using the correct URL when attempting to access your POC CNA account. Using an outdated link or mistyping the address could lead to errors or failed attempts at logging in.

Additionally, taking note of any error messages displayed during login attempts can help diagnose potential issues more effectively. These messages provide valuable feedback on what went wrong so that corrective action can be taken promptly.

Always remember to safeguard your login credentials by never sharing them with unauthorized persons and regularly updating passwords periodically for improved security measures.

How to create an effective login strategy

Creating an effective login strategy can greatly improve your chances of success when logging into your POC CNA account. The first step in creating this strategy is to assess your own habits and preferences when it comes to logging in. Do you prefer using a desktop computer, laptop or mobile device? Once you have identified your preferred platform, make sure that the device you select has all necessary plugins and software installed.

The next step is to ensure that you have all required login credentials on hand before attempting to log in. This includes usernames, passwords, PINs or any other security measures put in place by the system administrator.

Another important aspect of creating an effective login strategy is being aware of potential time constraints. If you are logging into your POC CNA account during peak hours, be prepared for longer wait times or potential server issues. Try logging in during off-peak hours to avoid these difficulties.

A good practice for ensuring a successful login experience is bookmarking the login page on your web browser so that it’s easily accessible whenever needed. You can also enable auto-fill options for frequently used fields such as username and password.

Consider setting up two-factor authentication if available as an added layer of security against unauthorized access attempts. With these tips outlined above, creating an effective login strategy will help streamline the process and increase productivity while accessing critical information within POC CNA accounts with ease!

Tips for properly formatting your CNA application

When it comes to applying for a POC CNA, formatting your application correctly is crucial. A well-formatted application can make all the difference in catching the attention of potential employers and securing an interview. Here are some tips for properly formatting your CNA application.

Firstly, make sure that you use easy-to-read fonts such as Arial or Times New Roman in size 12 or larger. Avoid using fancy or cursive fonts that may be difficult to read.

Next, organize your information into sections, starting with a header containing your name and contact details followed by an objective statement outlining why you want to become a POC CNA. Then list your relevant education and work experience in reverse chronological order.

When listing previous employment history, start with the most recent job first and include bullet points highlighting key responsibilities and achievements during each position held.

Ensure that your grammar is flawless throughout the entire application including proper punctuation usage; this will show professionalism and attention to detail which are important qualities of any successful employee.

Always proofread before submitting! Typos or grammatical errors detract from overall professional appearance so taking extra time checking over everything could mean landing that dream job opportunity!

Tips for creating a positive CNA experience

Creating a positive experience as a CNA is crucial not only for the patients but also for yourself. It can be challenging to maintain positivity while dealing with difficult situations, but it’s essential to remember that your attitude and approach can greatly impact patient care.

One of the best tips for creating a positive CNA experience is to always remain empathetic towards your patients. Put yourself in their shoes and try to understand what they’re going through. By doing so, you’ll be able to provide better care that caters specifically to their needs.

Another important tip is communication – make sure you are communicating clearly and effectively with both your colleagues and patients. This helps avoid misunderstandings and ensures everyone is on the same page.

It’s also vital to take breaks when needed, especially during stressful shifts. Take time away from work during lunch or other breaks throughout the day if possible, as this will help keep your energy levels up throughout the day.

Having a support system in place outside of work can go a long way in helping create a positive CNA experience. Whether it’s family or friends who offer encouragement or simply listening ear after tough days at work, having someone there for you can make all the difference in how you handle stressors on-the-job.

How to promote your POC CNA candidacy

One of the most important aspects of a successful POC CNA login is promoting your candidacy effectively. To ensure that you stand out from other candidates, it’s essential to have a clear and concise message about who you are as a certified nursing assistant.

Firstly, make sure your resume highlights your skills and experience in the healthcare industry. Include any relevant certifications or training programs you’ve completed, as well as any work experience that demonstrates your ability to provide excellent patient care.

Secondly, take advantage of online networking platforms like LinkedIn to connect with potential employers in the healthcare industry. Join groups related to nursing or healthcare administration and participate in conversations by sharing insightful comments and articles related to these topics.

Thirdly, be proactive in seeking out job opportunities by reaching out directly to hospitals, clinics, or long-term care facilities where you would like to work. Follow up on job postings promptly and maintain regular communication with hiring managers throughout the application process.

Lastly but not least importantly: always present yourself professionally during interviews by dressing appropriately for the role and demonstrating an enthusiastic attitude towards providing compassionate care for patients. By following these tips for promoting your POC CNA candidacy effectively, you can increase your chances of landing a rewarding career in this vital field.

What to do if you encounter any difficulties during your login process

Encountering any difficulties during your login process can be frustrating, but there are steps you can take to resolve the issue. First, double-check that you are entering your login credentials correctly. Make sure your Caps Lock is not on and that you have typed in the correct username and password.

If you still cannot log in, try resetting your password or contacting customer support for assistance. They may be able to provide additional troubleshooting tips or reset your account if necessary.

It’s also important to ensure that your internet connection is stable and strong enough for a successful login. If possible, try using a wired connection instead of Wi-Fi, as this can improve stability.

If all else fails, consider clearing your browser cache and cookies before attempting to log in again. This often resolves issues related to corrupted data or outdated information.

Remember that encountering difficulties during the login process is common and nothing to worry about – with patience and persistence, most issues can be resolved quickly so you can access your POC CNA account with ease!

Conclusion

Having a successful POC CNA login is crucial for anyone looking to pursue a career in the healthcare field. By following these tips and tricks, you can ensure that your login process goes smoothly and efficiently.

Remember to always have your login information ready, understand the basics of logging into your account, troubleshoot common problems, create an effective login strategy, properly format your application, promote your candidacy and seek help if needed.

By taking the time to prepare properly for your POC CNA login and following these guidelines, you will be setting yourself up for success on this important first step towards achieving your career goals.

Continue Reading
Click to comment

Leave a Reply

Your email address will not be published. Required fields are marked *

Technology

How To Use HQPotner: A Comprehensive Guide

Published

on

By

One tool that has gained popularity for its versatility and effectiveness is HQPotner. Whether you are a small business owner, a project manager, or an individual looking to streamline your tasks, HQPotner offers a comprehensive solution. In this guide, we will explore the various features and functionalities of HQPotner and provide a step-by-step walkthrough on how to make the most out of this powerful tool.

Chapter 1: Introduction to HQPotner

1.1 What is HQPotner?

HQPotner is an all-in-one business management tool designed to simplify and streamline various aspects of your work. From project management and team collaboration to task tracking and document sharing, HQPotner aims to centralize your workflow for increased efficiency.

1.2 Key Features

1.2.1 Project Management

HQPotner’s project management capabilities allow you to create, assign, and track projects seamlessly. From setting milestones to monitoring progress, this feature ensures that everyone on your team is on the same page.

1.2.2 Task Tracking

Efficient task tracking is essential for meeting deadlines. HQPotner enables you to create and assign tasks, set priorities, and monitor their status in real-time, ensuring nothing falls through the cracks.

1.2.3 Team Collaboration

Enhance communication and collaboration within your team through HQPotner’s collaborative features. Share files, exchange ideas, and keep everyone in the loop, fostering a more productive work environment.

1.2.4 Time Tracking

HQPotner’s time tracking feature helps you monitor the time spent on various tasks and projects. This data can be invaluable for optimizing workflows and improving overall productivity.

1.2.5 Document Management

Centralize your documents and ensure easy access for your team. HQPotner’s document management feature allows you to store, organize, and share files securely.

1.3 Why Choose HQPotner?

Before delving into the details of how to use HQPotner, it’s essential to understand why this tool stands out in a crowded market.

1.3.1 User-Friendly Interface

HQPotner boasts an intuitive and user-friendly interface, making it accessible for both tech-savvy professionals and those new to project management tools.

1.3.2 Scalability

Whether you’re a freelancer, a small business, or a large enterprise, HQPotner is scalable to meet your needs. You can start with the basics and expand your usage as your business grows.

1.3.3 Customization Options

Tailor HQPotner to your specific requirements with customizable features. From project templates to task categories, you have the flexibility to adapt the tool to your unique workflow.

Chapter 2: Getting Started with HQPotner

2.1 Account Setup

To begin using HQPotner, you’ll need to create an account. Follow these steps to set up your HQPotner account:

2.1.1 Visit the HQPotner Website

Navigate to the official HQPotner website and click on the “Sign Up” or “Get Started” button.

2.1.2 Fill in the Registration Form

Provide the necessary information, including your name, email address, and a secure password. Some plans may require additional details for billing purposes.

2.1.3 Confirm Your Email

Once you’ve filled in the registration form, check your email for a confirmation message from HQPotner. Click on the confirmation link to verify your account.

2.1.4 Set Up Your Profile

Log in to your newly created account and complete your profile by adding details such as your profile picture and job title. This step is crucial for team collaboration and communication.

2.2 Navigating the Dashboard

Upon logging in, you’ll be greeted by the HQPotner dashboard. Familiarize yourself with the main elements:

2.2.1 Navigation Menu

The navigation menu typically includes tabs for Home, Projects, Tasks, Team, Time Tracking, and Documents. Each tab corresponds to a different aspect of HQPotner’s functionalities.

2.2.2 Project Overview

The dashboard may feature a project overview section, displaying key metrics such as active projects, completed tasks, and upcoming deadlines.

2.2.3 Quick Access Toolbar

Look for a toolbar or sidebar that provides quick access to frequently used features, such as creating a new project, adding a task, or uploading a document.

2.3 Creating Your First Project

Now that your account is set up, it’s time to start using HQPotner for your projects. Follow these steps to create your first project:

2.3.1 Click on the “Projects” Tab

Navigate to the “Projects” tab in the navigation menu.

2.3.2 Select “Create New Project”

Look for a button or option that allows you to create a new project. This may be prominently displayed on the page.

2.3.3 Fill in Project Details

Provide essential details for your project, including the project name, description, and start date. You may also have the option to set milestones at this stage.

2.3.4 Add Team Members

Invite team members to the project by entering their email addresses. HQPotner may send invitations to these individuals to join the platform.

2.3.5 Set Permissions

Define the permissions for each team member. Specify who can edit the project details, add tasks, or upload documents.

2.3.6 Save and Start Your Project

Once all details are entered, save your project. You can now start adding tasks and collaborating with your team.

Chapter 3: Project Management with HQPotner

3.1 Task Creation and Assignment

Effective project management begins with creating and assigning tasks. HQPotner simplifies this process:

3.1.1 Navigate to the “Tasks” Tab

Click on the “Tasks” tab in the navigation menu to access the task management interface.

3.1.2 Create a New Task

Look for an option to create a new task. Provide details such as task name, description, due date, and priority level.

3.1.3 Assign the Task

Assign the task to a team member by selecting their name from the list of project members. You may also be able to set task dependencies at this stage.

3.1.4 Save the Task

Save the task to add it to the project’s task list. Repeat this process for each task within the project.

3.2 Milestone Tracking

Milestones are crucial for tracking progress and ensuring that your project stays on schedule. Follow these steps to set and track milestones:

3.2.1 Access the Project

Navigate to the project for which you want to set milestones.

3.2.2 Click on the “Milestones” Section

Look for a dedicated section or tab labeled “Milestones” within the project interface.

3.2.3 Add New Milestone

Create a new milestone by providing a name, description, and due date. Assign the milestone to specific tasks if needed.

3.2.4 Monitor Milestone Progress

As tasks associated with a milestone are completed, the milestone progress will automatically update. Use this feature to gauge project advancement.

3.3 Time Tracking and Reporting

HQPotner’s time tracking feature allows you to monitor how much time is spent on each task. This information is valuable for assessing project costs and optimizing resource allocation:

3.3.1 Activate Time Tracking

Ensure that time tracking is activated for your project. This setting is often found in the project details or settings section.

3.3.2 Log Time for Tasks

Encourage team members to log their working hours for each task. This can usually be done by accessing the task and entering the time spent.

3.3.3 Generate Time Reports

Explore the reporting features in HQPotner to generate time reports. These reports provide insights into how time is distributed across various tasks and projects.

3.4 Document Management and Collaboration

Centralize your project documents within HQPotner to enhance collaboration and ensure easy access:

3.4.1 Upload Documents

Navigate to the “Documents” tab and upload relevant project documents. Categorize them appropriately for easy retrieval.

3.4.2 Set Document Permissions

Define who can access and edit each document by setting document permissions. This ensures that sensitive information is only available to authorized team members.

3.4.3 Collaborate in Real-Time

Encourage team members to use the collaborative features when working on documents. Real-time editing and commenting streamline the collaborative process.

Chapter 4: Team Collaboration in HQPotner

4.1 Communication Tools

HQPotner provides various communication tools to facilitate collaboration among team members. Explore these features to enhance communication:

4.1.1 Team Chat

Utilize the team chat feature for quick and informal communication. This is especially useful for discussions that don’t require formal documentation.

4.1.2 Discussion Threads

For more in-depth conversations, use discussion threads within tasks or projects. This keeps relevant communication tied to specific items.

4.1.3 Notifications

Configure notification settings to ensure that team members are alerted to important updates, mentions, or changes within the platform.

4.2 Calendar Integration

Sync your project timelines and deadlines with external calendars to keep everyone on the same page:

4.2.1 Integration Setup

Explore HQPotner’s integration options and connect your account to external calendars such as Google Calendar or Outlook.

4.2.2 Calendar View

Navigate to the calendar view within HQPotner to see project timelines and deadlines alongside other scheduled events.

4.2.3 Synchronize Changes

Any changes made within HQPotner, such as task updates or milestone completions, should automatically reflect in the integrated calendar.

Chapter 5: Advanced Features and Customization

5.1 Project Templates

Save time on project setup by utilizing project templates. HQPotner allows you to create templates for recurring project types:

5.1.1 Create a Project Template

Once you’ve successfully completed a project, save it as a template for future use. This can include predefined tasks, milestones, and document structures.

5.1.2 Apply Templates to New Projects

When creating a new project, choose to apply a template. This populates the project with the predefined structure, saving time on repetitive tasks.

5.2 Custom Workflows

Tailor HQPotner to your unique workflow with customizable features:

5.2.1 Workflow Analysis

Assess your team’s workflow and identify areas where customization can enhance efficiency.

5.2.2 Adjust Task Categories

Modify task categories to align with your project requirements. This ensures that tasks are organized in a way that makes sense for your team.

5.2.3 User Permissions

Review and adjust user permissions regularly to ensure that team members have the appropriate level of access.

Chapter 6: Troubleshooting and Support

6.1 Help Center

If you encounter issues or have questions about using HQPotner, consult the platform’s help center:

6.1.1 Access Help Center

Look for a “Help” or “Support” section within the HQPotner interface.

6.1.2 Search for Solutions

Use the search feature to find articles and guides related to your issue. The help center often contains detailed troubleshooting steps.

6.2 Customer Support

If the help center doesn’t address your concerns, reach out to HQPotner’s customer support:

6.2.1 Contact Information

Find the contact information for HQPotner’s customer support, including email addresses, phone numbers, or a live chat option.

6.2.2 Provide Detailed Information

When contacting support, provide detailed information about the issue you’re experiencing. This helps expedite the resolution process.

Chapter 7: Security and Data Privacy

7.1 Security Features

Ensure the security of your data by understanding and utilizing HQPotner’s security features:

7.1.1 Encryption

Verify that HQPotner employs encryption protocols to protect your data during transmission and storage.

7.1.2 Two-Factor Authentication

Enable two-factor authentication for an additional layer of security, especially if your account contains sensitive project information.

7.2 Data Privacy Compliance

Understand how HQPotner complies with data privacy regulations to safeguard your information:

7.2.1 Privacy Policies

Review HQPotner’s privacy policies to understand how your data is collected, stored, and used.

7.2.2 Compliance Standards

Check if HQPotner adheres to industry standards and regulations such as GDPR or HIPAA, depending on your business requirements.

Chapter 8: Integration with Other Tools

8.1 Overview of Integrations

HQPotner’s integration capabilities allow you to connect with other tools and enhance your overall workflow:

8.1.1 Available Integrations

Explore the list of integrations supported by HQPotner. This may include popular project management tools, communication platforms, and file storage solutions.

8.1.2 Integration Setup

Follow the instructions provided by HQPotner to set up integrations with other tools. This may involve granting permissions or connecting accounts.

8.1.3 Benefits of Integration

Understand the benefits of integrating HQPotner with other tools, such as streamlined communication, centralized data, and improved overall efficiency.

Chapter 9: Real-Life Use Cases and Success Stories

9.1 Case Studies

Explore real-life examples of how businesses and individuals have successfully utilized HQPotner for their projects:

9.1.1 Small Business Project Management

Learn how a small business used HQPotner to manage projects, collaborate with remote teams, and improve overall productivity.

9.1.2 Freelancer Success Story

Discover how a freelancer utilized HQPotner to organize tasks, track time, and communicate effectively with clients.

9.2 Tips from Power Users

Gather insights from experienced HQPotner users who have mastered the tool’s capabilities:

9.2.1 Time-Saving Tips

Learn tips and tricks for saving time on routine tasks, such as utilizing keyboard shortcuts and setting up automated workflows.

Continue Reading

Technology

Step-by-Step Guide to Creating Stamp Size Photos in CM

Published

on

By

The need for physical passport-sized or stamp-sized photos hasn’t diminished. Whether it’s for official documents, visa applications, or ID cards, having a set of professional-looking stamp size photos is essential. In this step-by-step guide, we’ll explore how to create stamp size photos using Adobe Photoshop, one of the most powerful and widely used photo editing tools available.

Step 1: Acquire the Right Tools

Before diving into the process of creating stamp size photos, ensure you have the necessary tools:

  1. Adobe Photoshop: Download and install the latest version of Adobe Photoshop on your computer.
  2. Digital Photo: Choose a high-resolution digital photo with good lighting and a plain background. It’s essential that the photo meets the specifications required for stamp size photos.
  3. Photo Printer: To print your stamp size photos, you’ll need a reliable photo printer. Make sure it’s calibrated and produces accurate colors.

Step 2: Open Photoshop and Create a New Document

  1. Launch Photoshop: Open Adobe Photoshop on your computer.
  2. Create a New Document: Go to File > New to create a new document. Set the dimensions to the required size for stamp photos, typically 2 inches by 2 inches.
  3. Adjust Resolution: Set the resolution to a minimum of 300 pixels per inch (PPI) to ensure high print quality.

Step 3: Import and Position Your Photo

  1. Import Photo: Open the digital photo you’ve chosen for the stamp size image. Use File > Open to import the photo into the newly created document.
  2. Resize and Position: Use the Transform tool (Ctrl+T or Command+T) to resize and position the photo within the stamp size canvas. Ensure the face is centered and occupies a significant portion of the frame.

Step 4: Crop and Trim

  1. Crop Image: Use the Crop tool to trim any unnecessary parts of the photo. Maintain the aspect ratio to prevent distortion.
  2. Trim Canvas: If needed, use the Trim command (Image > Trim) to remove any excess canvas space, ensuring the final image is precisely 2×2 inches.

Step 5: Adjust Brightness and Contrast

  1. Brightness/Contrast: Navigate to Image > Adjustments > Brightness/Contrast to fine-tune the overall brightness and contrast of the photo. Ensure the facial features are well-defined without losing detail.

Step 6: Enhance Color

  1. Color Correction: Use Image > Adjustments > Color Balance to correct any color discrepancies in the photo. Aim for natural and accurate skin tones.
  2. Saturation: Adjust the saturation if necessary, but avoid making the image overly vibrant.

Step 7: Add a Background Layer

  1. New Layer: Create a new layer (Layer > New > Layer) and position it below the photo layer.
  2. Fill Background: Use the Paint Bucket tool to fill the background layer with a neutral color, often white or light gray. This step ensures a clean and professional appearance.

Step 8: Final Touches

  1. Sharpen Image: Apply a subtle amount of sharpening to enhance the overall clarity of the photo. Use Filter > Sharpen > Unsharp Mask for this purpose.
  2. Save Your Work: Save the final image in a high-quality format such as JPEG or PNG.

Step 9: Print Your Stamp Size Photos

  1. Select Printer Settings: Before printing, ensure your printer settings match the dimensions of your Photoshop document. Set the paper type to photo paper for optimal results.
  2. Print Test Page: Print a test page on regular paper to check the layout and ensure the photo is correctly positioned within the stamp size dimensions.
  3. Print Final Photos: Once satisfied with the test print, use high-quality photo paper to print the final stamp size photos.

Conclusion

Creating stamp size photos in Photoshop is a straightforward process that, when done correctly, yields professional and polished results. By following this step-by-step guide, you can ensure that your stamp size photos meet the required specifications for official documents, visa applications, and various identification purposes. Take the time to pay attention to detail, and you’ll be equipped with the skills to produce impeccable stamp size photos for any occasion.

Continue Reading

Technology

Beyond Trillion: Navigating the Unfathomable Realm of Numbers

Published

on

By

Numbers serve as the building blocks that allow us to comprehend and quantify the world around us. From the simplicity of counting a handful of objects to the complexities of advanced scientific calculations, numbers are an integral part of our daily lives. However, as we delve deeper into the realm of large numbers, a question arises: What comes after a trillion?

1. The Journey to a Trillion:

To understand what comes after a trillion, we must first appreciate the significance of reaching such colossal numerical values. The journey begins with a review of the metric prefixes used to denote powers of 10. From thousands to millions, billions, and trillions, each step represents a tenfold increase in quantity. Tracing this progression provides the foundation for comprehending the mind-boggling magnitudes that lie beyond.

2. Quadrillions and Quintillions:

Once we grasp the concept of a trillion, the natural progression leads us to explore numbers like quadrillions and quintillions. These astronomical figures find applications in various scientific fields, from astronomy to economics. Examining real-world examples helps to contextualize the enormity of these numbers and highlights their importance in understanding the vastness of our universe and global economies.

3. Beyond Human Comprehension: Googols and Googolplex:

As we venture further into the unfathomable realm of numbers, we encounter terms like “googol” and “googolplex.” Coined by mathematician Edward Kasner, these terms represent numbers so colossal that they surpass the capacity of the human mind to truly grasp. Delving into the theoretical aspects of these numbers offers insights into the limits of our numerical comprehension and the sheer boundlessness of mathematical possibilities.

4. Infinite Realms: Aleph Numbers and Beyond:

Beyond finite numbers lie the infinite realms of mathematics. Aleph numbers, introduced by Georg Cantor, open the door to understanding different sizes of infinity. Exploring the concept of the continuum hypothesis and the continuum of real numbers provides a glimpse into the philosophical and mathematical questions surrounding the nature of infinity.

5. The Mathematical Cosmos: Graham’s Number:

Graham’s number, a number so large that it exceeds any practical value in the physical universe, introduces us to the outer limits of mathematical exploration. Conceived in the realm of combinatorics, this number pushes the boundaries of what is expressible and computable, challenging our understanding of what it means to quantify the infinite.

6. Theoretical Limits: Ackermann Function and TREE(3):

Beyond Graham’s number, we encounter mathematical constructs like the Ackermann function and TREE(3). These functions stretch the limits of computability and demonstrate the theoretical boundaries of mathematical exploration. Examining the properties and significance of these functions sheds light on the nature of mathematical inquiry at the fringes of human comprehension.

7. Practical Applications: Large Numbers in Science and Technology:

While some of these astronomical numbers may seem purely theoretical, they find practical applications in diverse fields such as computer science, cryptography, and cosmology. Exploring how these large numbers are employed in real-world scenarios provides a bridge between the theoretical and the tangible, showcasing the relevance of these mathematical concepts in our technologically advanced world.

8. The Philosophical Implications: Can We Grasp Infinity?

As we navigate the realms of ever-increasing numbers, we confront the philosophical question of whether the human mind can truly grasp the concept of infinity. Drawing on insights from philosophy, psychology, and cognitive science, we explore the limits of human understanding and the challenges posed by the infinite.

9. Beyond Numbers: Hyperoperations and Transfinite Arithmetic:

In the pursuit of understanding what comes after a trillion, we delve into hyperoperations and transfinite arithmetic. These concepts extend the traditional operations of addition, multiplication, and exponentiation into uncharted territory, revealing the richness of mathematical structures that exist beyond conventional numerical frameworks.

10. The Future of Numbers: Speculations and Possibilities:

As technology advances and our understanding of mathematics evolves, what might the future hold for the exploration of numbers? Speculating on the possibilities of new mathematical discoveries and the potential for even larger numbers challenges us to envision the frontiers of mathematical inquiry that lie ahead.

Conclusion:

In our journey beyond a trillion, we have traversed the vast and incomprehensible landscapes of numbers. From the familiar realms of thousands and millions to the mind-bending expanses of googols, infinities, and beyond, the world of numbers is a testament to the limitless nature of mathematical exploration. As we stand on the precipice of the unknown, the quest to understand what comes after a trillion continues, propelling us into the boundless realms of mathematical discovery and innovation.

Continue Reading

Trending

Copyright © 2022 webinvogue.com. All rights reserved.