Connect with us

Technology

Top 7 Maintenance Guidelines for Your Razer Blade 15 2018 H2

Published

on

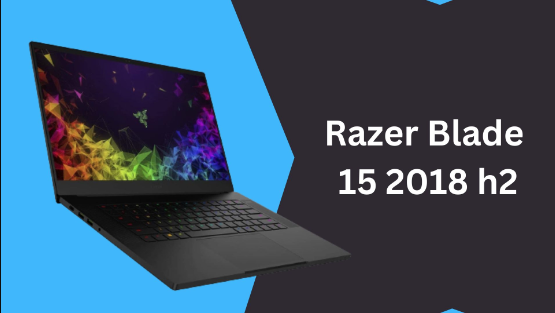
Are you the proud owner of a Razer Blade 15 2018 H2? This high-performing gaming laptop is designed to keep up with your fast-paced life and provide an immersive gaming experience. However, like any other electronic device, it requires proper maintenance and care to ensure optimal performance. In this blog post, we’ll discuss the top seven maintenance guidelines for your Razer Blade 15 so that you can enjoy uninterrupted gaming sessions without worrying about hardware issues or glitches. From cleaning to firmware updates, we’ve got you covered!

Cleaning and Maintenance

Cleaning and maintaining your Razer Blade 15 is essential to keep it running smoothly. The first step in maintenance is regular cleaning of the exterior and interior parts. To clean the laptop’s body, use a soft cloth or microfiber towel with some water or mild detergent. For stubborn stains, you can use rubbing alcohol or a specialized cleaning solution.

To clean the keyboard, turn off the laptop and unplug it from the power source. Use compressed air to remove any dust or debris between keys, then wipe down each key with a damp cloth.

The next step is updating drivers and firmware regularly to ensure maximum performance. You can easily check for updates by visiting Razer’s website or using their software utility tool.

Another crucial aspect of maintenance is monitoring temperature levels while gaming as overheating can cause hardware damage. Using cooling pads, elevating your laptop on a stand or desk, and keeping vents clear of obstructions are effective ways to prevent overheating issues.

Always handle your device carefully to avoid accidental drops that could damage internal components. By following these simple guidelines for maintenance and care, you’ll prolong the lifespan of your Razer Blade 15 H2 thereby getting optimal performance all through its usage period!

Updating Firmware

Updating Firmware is an essential aspect of maintaining your Razer Blade 15 2018 H2. It’s a process that involves updating the software embedded in the hardware components of your device, such as BIOS or firmware for other devices.

Firmware updates can help improve system performance, fix bugs and security vulnerabilities, and add new features to your laptop. Therefore, it’s recommended to update firmware regularly.

You can check for available firmware updates using Razer Synapse or through the manufacturer’s website. Once you have identified an update, make sure that there is no ongoing operation before initiating the update process.

During the update process, ensure that you don’t interrupt power supply or shut down your device as this may cause irreversible damage to its hardware components. Also, avoid using any external devices during this time.

After completing the firmware update successfully restarts your Razer Blade 15 2018 H2 so that changes take effect properly.

Keeping up with regular Firmware updates ensures optimal performance and functionality from your device while also providing enhanced security measures against potential threats.

Backlight and Keyboard Brightness

One of the standout features of Razer Blade 15 2018 H2 is its customizable backlight and keyboard brightness. Not only does it add to the aesthetic appeal, but it also enhances your typing experience by allowing you to adjust the light intensity according to your preference.

To access these settings, simply press the ‘Fn’ key and use the arrow keys located on the bottom right-hand corner of your keyboard. You can either increase or decrease brightness levels until you find a comfortable level for both day and night use.

Another great feature is that you can customize individual keys with different colors through Razer’s Synapse software. This allows for greater personalization and adds a unique touch to your gaming setup.

It’s important to keep in mind that excessive usage at high brightness levels may affect battery life over time. Therefore, it’s recommended that you adjust lighting settings based on environmental conditions and personal preference while keeping an eye on battery consumption.

Having control over backlighting and keyboard brightness provides a more immersive gaming experience while adding style to your setup. It’s worth experimenting with different combinations until you find what works best for you!

Battery Care

Battery Care:

One of the most important aspects of maintaining your Razer Blade 15 2018 H2 is taking care of its battery. Here are some guidelines to help you keep your laptop’s battery in good condition.

First and foremost, it’s essential to avoid overcharging or undercharging the battery. Make sure that you charge it only when it needs charging and unplug it as soon as it reaches a full charge.

Another way to minimize wear and tear on your laptop’s battery is by adjusting its power settings. Lowering screen brightness, turning off unused programs running in the background, and putting the computer into sleep mode can all help extend battery life.

It’s also crucial to avoid exposing your laptop’s battery to extreme temperatures since high heat or cold can damage the cells inside. Store your device in a cool place when not in use.

If you plan on storing away your laptop for an extended period without using it at all, make sure that its battery has around a 50% charge before doing so. This helps prevent any potential damage caused by complete discharge or overcharging during storage.

By following these simple tips for proper Battery Care, you can ensure that your Razer Blade 15 stays healthy and lasts longer between charges!

Troubleshooting

Troubleshooting is an important aspect of maintaining your Razer Blade 15 2018 H2. It can help you identify and fix problems that may arise with your device. Here are some troubleshooting techniques to keep in mind:

Firstly, if you notice any performance issues, try updating your drivers and firmware. This can often solve the problem.

If you’re experiencing overheating or fan noise, check to make sure that the ventilation holes on the bottom of the laptop are clean and not blocked by dust or debris.

Another common issue is battery drainage. To prevent this, reduce screen brightness and close unnecessary programs when not in use.

If there are hardware issues such as a malfunctioning keyboard or touchpad, contact customer support for assistance or bring it to a local repair shop.

It’s also important to regularly scan for malware and viruses using anti-virus software.

By taking these steps towards troubleshooting your Razer Blade 15 2018 H2, you can ensure optimal performance from your device for years to come.

Conclusion

The Razer Blade 15 2018 H2 is a high-performance gaming laptop that requires proper maintenance to ensure its longevity. By following these top seven maintenance guidelines, you can keep your Razer Blade 15 running smoothly and efficiently for years to come.

Regular cleaning and firmware updates are essential for optimal performance. Adjusting the backlight and keyboard brightness can enhance your gaming experience while preserving battery life through careful charging habits.

If issues do arise, troubleshooting steps outlined above can help solve common problems without costly repairs or replacements. Always prioritize safe handling of the device during maintenance procedures.

By taking care of your Razer Blade 15 with these simple tips, you’ll be able to enjoy uninterrupted gameplay with world-class graphics and speed – now and in the future!

Continue Reading
Click to comment

Leave a Reply

Your email address will not be published. Required fields are marked *

Technology

How To Use HQPotner: A Comprehensive Guide

Published

on

By

One tool that has gained popularity for its versatility and effectiveness is HQPotner. Whether you are a small business owner, a project manager, or an individual looking to streamline your tasks, HQPotner offers a comprehensive solution. In this guide, we will explore the various features and functionalities of HQPotner and provide a step-by-step walkthrough on how to make the most out of this powerful tool.

Chapter 1: Introduction to HQPotner

1.1 What is HQPotner?

HQPotner is an all-in-one business management tool designed to simplify and streamline various aspects of your work. From project management and team collaboration to task tracking and document sharing, HQPotner aims to centralize your workflow for increased efficiency.

1.2 Key Features

1.2.1 Project Management

HQPotner’s project management capabilities allow you to create, assign, and track projects seamlessly. From setting milestones to monitoring progress, this feature ensures that everyone on your team is on the same page.

1.2.2 Task Tracking

Efficient task tracking is essential for meeting deadlines. HQPotner enables you to create and assign tasks, set priorities, and monitor their status in real-time, ensuring nothing falls through the cracks.

1.2.3 Team Collaboration

Enhance communication and collaboration within your team through HQPotner’s collaborative features. Share files, exchange ideas, and keep everyone in the loop, fostering a more productive work environment.

1.2.4 Time Tracking

HQPotner’s time tracking feature helps you monitor the time spent on various tasks and projects. This data can be invaluable for optimizing workflows and improving overall productivity.

1.2.5 Document Management

Centralize your documents and ensure easy access for your team. HQPotner’s document management feature allows you to store, organize, and share files securely.

1.3 Why Choose HQPotner?

Before delving into the details of how to use HQPotner, it’s essential to understand why this tool stands out in a crowded market.

1.3.1 User-Friendly Interface

HQPotner boasts an intuitive and user-friendly interface, making it accessible for both tech-savvy professionals and those new to project management tools.

1.3.2 Scalability

Whether you’re a freelancer, a small business, or a large enterprise, HQPotner is scalable to meet your needs. You can start with the basics and expand your usage as your business grows.

1.3.3 Customization Options

Tailor HQPotner to your specific requirements with customizable features. From project templates to task categories, you have the flexibility to adapt the tool to your unique workflow.

Chapter 2: Getting Started with HQPotner

2.1 Account Setup

To begin using HQPotner, you’ll need to create an account. Follow these steps to set up your HQPotner account:

2.1.1 Visit the HQPotner Website

Navigate to the official HQPotner website and click on the “Sign Up” or “Get Started” button.

2.1.2 Fill in the Registration Form

Provide the necessary information, including your name, email address, and a secure password. Some plans may require additional details for billing purposes.

2.1.3 Confirm Your Email

Once you’ve filled in the registration form, check your email for a confirmation message from HQPotner. Click on the confirmation link to verify your account.

2.1.4 Set Up Your Profile

Log in to your newly created account and complete your profile by adding details such as your profile picture and job title. This step is crucial for team collaboration and communication.

2.2 Navigating the Dashboard

Upon logging in, you’ll be greeted by the HQPotner dashboard. Familiarize yourself with the main elements:

2.2.1 Navigation Menu

The navigation menu typically includes tabs for Home, Projects, Tasks, Team, Time Tracking, and Documents. Each tab corresponds to a different aspect of HQPotner’s functionalities.

2.2.2 Project Overview

The dashboard may feature a project overview section, displaying key metrics such as active projects, completed tasks, and upcoming deadlines.

2.2.3 Quick Access Toolbar

Look for a toolbar or sidebar that provides quick access to frequently used features, such as creating a new project, adding a task, or uploading a document.

2.3 Creating Your First Project

Now that your account is set up, it’s time to start using HQPotner for your projects. Follow these steps to create your first project:

2.3.1 Click on the “Projects” Tab

Navigate to the “Projects” tab in the navigation menu.

2.3.2 Select “Create New Project”

Look for a button or option that allows you to create a new project. This may be prominently displayed on the page.

2.3.3 Fill in Project Details

Provide essential details for your project, including the project name, description, and start date. You may also have the option to set milestones at this stage.

2.3.4 Add Team Members

Invite team members to the project by entering their email addresses. HQPotner may send invitations to these individuals to join the platform.

2.3.5 Set Permissions

Define the permissions for each team member. Specify who can edit the project details, add tasks, or upload documents.

2.3.6 Save and Start Your Project

Once all details are entered, save your project. You can now start adding tasks and collaborating with your team.

Chapter 3: Project Management with HQPotner

3.1 Task Creation and Assignment

Effective project management begins with creating and assigning tasks. HQPotner simplifies this process:

3.1.1 Navigate to the “Tasks” Tab

Click on the “Tasks” tab in the navigation menu to access the task management interface.

3.1.2 Create a New Task

Look for an option to create a new task. Provide details such as task name, description, due date, and priority level.

3.1.3 Assign the Task

Assign the task to a team member by selecting their name from the list of project members. You may also be able to set task dependencies at this stage.

3.1.4 Save the Task

Save the task to add it to the project’s task list. Repeat this process for each task within the project.

3.2 Milestone Tracking

Milestones are crucial for tracking progress and ensuring that your project stays on schedule. Follow these steps to set and track milestones:

3.2.1 Access the Project

Navigate to the project for which you want to set milestones.

3.2.2 Click on the “Milestones” Section

Look for a dedicated section or tab labeled “Milestones” within the project interface.

3.2.3 Add New Milestone

Create a new milestone by providing a name, description, and due date. Assign the milestone to specific tasks if needed.

3.2.4 Monitor Milestone Progress

As tasks associated with a milestone are completed, the milestone progress will automatically update. Use this feature to gauge project advancement.

3.3 Time Tracking and Reporting

HQPotner’s time tracking feature allows you to monitor how much time is spent on each task. This information is valuable for assessing project costs and optimizing resource allocation:

3.3.1 Activate Time Tracking

Ensure that time tracking is activated for your project. This setting is often found in the project details or settings section.

3.3.2 Log Time for Tasks

Encourage team members to log their working hours for each task. This can usually be done by accessing the task and entering the time spent.

3.3.3 Generate Time Reports

Explore the reporting features in HQPotner to generate time reports. These reports provide insights into how time is distributed across various tasks and projects.

3.4 Document Management and Collaboration

Centralize your project documents within HQPotner to enhance collaboration and ensure easy access:

3.4.1 Upload Documents

Navigate to the “Documents” tab and upload relevant project documents. Categorize them appropriately for easy retrieval.

3.4.2 Set Document Permissions

Define who can access and edit each document by setting document permissions. This ensures that sensitive information is only available to authorized team members.

3.4.3 Collaborate in Real-Time

Encourage team members to use the collaborative features when working on documents. Real-time editing and commenting streamline the collaborative process.

Chapter 4: Team Collaboration in HQPotner

4.1 Communication Tools

HQPotner provides various communication tools to facilitate collaboration among team members. Explore these features to enhance communication:

4.1.1 Team Chat

Utilize the team chat feature for quick and informal communication. This is especially useful for discussions that don’t require formal documentation.

4.1.2 Discussion Threads

For more in-depth conversations, use discussion threads within tasks or projects. This keeps relevant communication tied to specific items.

4.1.3 Notifications

Configure notification settings to ensure that team members are alerted to important updates, mentions, or changes within the platform.

4.2 Calendar Integration

Sync your project timelines and deadlines with external calendars to keep everyone on the same page:

4.2.1 Integration Setup

Explore HQPotner’s integration options and connect your account to external calendars such as Google Calendar or Outlook.

4.2.2 Calendar View

Navigate to the calendar view within HQPotner to see project timelines and deadlines alongside other scheduled events.

4.2.3 Synchronize Changes

Any changes made within HQPotner, such as task updates or milestone completions, should automatically reflect in the integrated calendar.

Chapter 5: Advanced Features and Customization

5.1 Project Templates

Save time on project setup by utilizing project templates. HQPotner allows you to create templates for recurring project types:

5.1.1 Create a Project Template

Once you’ve successfully completed a project, save it as a template for future use. This can include predefined tasks, milestones, and document structures.

5.1.2 Apply Templates to New Projects

When creating a new project, choose to apply a template. This populates the project with the predefined structure, saving time on repetitive tasks.

5.2 Custom Workflows

Tailor HQPotner to your unique workflow with customizable features:

5.2.1 Workflow Analysis

Assess your team’s workflow and identify areas where customization can enhance efficiency.

5.2.2 Adjust Task Categories

Modify task categories to align with your project requirements. This ensures that tasks are organized in a way that makes sense for your team.

5.2.3 User Permissions

Review and adjust user permissions regularly to ensure that team members have the appropriate level of access.

Chapter 6: Troubleshooting and Support

6.1 Help Center

If you encounter issues or have questions about using HQPotner, consult the platform’s help center:

6.1.1 Access Help Center

Look for a “Help” or “Support” section within the HQPotner interface.

6.1.2 Search for Solutions

Use the search feature to find articles and guides related to your issue. The help center often contains detailed troubleshooting steps.

6.2 Customer Support

If the help center doesn’t address your concerns, reach out to HQPotner’s customer support:

6.2.1 Contact Information

Find the contact information for HQPotner’s customer support, including email addresses, phone numbers, or a live chat option.

6.2.2 Provide Detailed Information

When contacting support, provide detailed information about the issue you’re experiencing. This helps expedite the resolution process.

Chapter 7: Security and Data Privacy

7.1 Security Features

Ensure the security of your data by understanding and utilizing HQPotner’s security features:

7.1.1 Encryption

Verify that HQPotner employs encryption protocols to protect your data during transmission and storage.

7.1.2 Two-Factor Authentication

Enable two-factor authentication for an additional layer of security, especially if your account contains sensitive project information.

7.2 Data Privacy Compliance

Understand how HQPotner complies with data privacy regulations to safeguard your information:

7.2.1 Privacy Policies

Review HQPotner’s privacy policies to understand how your data is collected, stored, and used.

7.2.2 Compliance Standards

Check if HQPotner adheres to industry standards and regulations such as GDPR or HIPAA, depending on your business requirements.

Chapter 8: Integration with Other Tools

8.1 Overview of Integrations

HQPotner’s integration capabilities allow you to connect with other tools and enhance your overall workflow:

8.1.1 Available Integrations

Explore the list of integrations supported by HQPotner. This may include popular project management tools, communication platforms, and file storage solutions.

8.1.2 Integration Setup

Follow the instructions provided by HQPotner to set up integrations with other tools. This may involve granting permissions or connecting accounts.

8.1.3 Benefits of Integration

Understand the benefits of integrating HQPotner with other tools, such as streamlined communication, centralized data, and improved overall efficiency.

Chapter 9: Real-Life Use Cases and Success Stories

9.1 Case Studies

Explore real-life examples of how businesses and individuals have successfully utilized HQPotner for their projects:

9.1.1 Small Business Project Management

Learn how a small business used HQPotner to manage projects, collaborate with remote teams, and improve overall productivity.

9.1.2 Freelancer Success Story

Discover how a freelancer utilized HQPotner to organize tasks, track time, and communicate effectively with clients.

9.2 Tips from Power Users

Gather insights from experienced HQPotner users who have mastered the tool’s capabilities:

9.2.1 Time-Saving Tips

Learn tips and tricks for saving time on routine tasks, such as utilizing keyboard shortcuts and setting up automated workflows.

Continue Reading

Technology

Step-by-Step Guide to Creating Stamp Size Photos in CM

Published

on

By

The need for physical passport-sized or stamp-sized photos hasn’t diminished. Whether it’s for official documents, visa applications, or ID cards, having a set of professional-looking stamp size photos is essential. In this step-by-step guide, we’ll explore how to create stamp size photos using Adobe Photoshop, one of the most powerful and widely used photo editing tools available.

Step 1: Acquire the Right Tools

Before diving into the process of creating stamp size photos, ensure you have the necessary tools:

  1. Adobe Photoshop: Download and install the latest version of Adobe Photoshop on your computer.
  2. Digital Photo: Choose a high-resolution digital photo with good lighting and a plain background. It’s essential that the photo meets the specifications required for stamp size photos.
  3. Photo Printer: To print your stamp size photos, you’ll need a reliable photo printer. Make sure it’s calibrated and produces accurate colors.

Step 2: Open Photoshop and Create a New Document

  1. Launch Photoshop: Open Adobe Photoshop on your computer.
  2. Create a New Document: Go to File > New to create a new document. Set the dimensions to the required size for stamp photos, typically 2 inches by 2 inches.
  3. Adjust Resolution: Set the resolution to a minimum of 300 pixels per inch (PPI) to ensure high print quality.

Step 3: Import and Position Your Photo

  1. Import Photo: Open the digital photo you’ve chosen for the stamp size image. Use File > Open to import the photo into the newly created document.
  2. Resize and Position: Use the Transform tool (Ctrl+T or Command+T) to resize and position the photo within the stamp size canvas. Ensure the face is centered and occupies a significant portion of the frame.

Step 4: Crop and Trim

  1. Crop Image: Use the Crop tool to trim any unnecessary parts of the photo. Maintain the aspect ratio to prevent distortion.
  2. Trim Canvas: If needed, use the Trim command (Image > Trim) to remove any excess canvas space, ensuring the final image is precisely 2×2 inches.

Step 5: Adjust Brightness and Contrast

  1. Brightness/Contrast: Navigate to Image > Adjustments > Brightness/Contrast to fine-tune the overall brightness and contrast of the photo. Ensure the facial features are well-defined without losing detail.

Step 6: Enhance Color

  1. Color Correction: Use Image > Adjustments > Color Balance to correct any color discrepancies in the photo. Aim for natural and accurate skin tones.
  2. Saturation: Adjust the saturation if necessary, but avoid making the image overly vibrant.

Step 7: Add a Background Layer

  1. New Layer: Create a new layer (Layer > New > Layer) and position it below the photo layer.
  2. Fill Background: Use the Paint Bucket tool to fill the background layer with a neutral color, often white or light gray. This step ensures a clean and professional appearance.

Step 8: Final Touches

  1. Sharpen Image: Apply a subtle amount of sharpening to enhance the overall clarity of the photo. Use Filter > Sharpen > Unsharp Mask for this purpose.
  2. Save Your Work: Save the final image in a high-quality format such as JPEG or PNG.

Step 9: Print Your Stamp Size Photos

  1. Select Printer Settings: Before printing, ensure your printer settings match the dimensions of your Photoshop document. Set the paper type to photo paper for optimal results.
  2. Print Test Page: Print a test page on regular paper to check the layout and ensure the photo is correctly positioned within the stamp size dimensions.
  3. Print Final Photos: Once satisfied with the test print, use high-quality photo paper to print the final stamp size photos.

Conclusion

Creating stamp size photos in Photoshop is a straightforward process that, when done correctly, yields professional and polished results. By following this step-by-step guide, you can ensure that your stamp size photos meet the required specifications for official documents, visa applications, and various identification purposes. Take the time to pay attention to detail, and you’ll be equipped with the skills to produce impeccable stamp size photos for any occasion.

Continue Reading

Technology

Beyond Trillion: Navigating the Unfathomable Realm of Numbers

Published

on

By

Numbers serve as the building blocks that allow us to comprehend and quantify the world around us. From the simplicity of counting a handful of objects to the complexities of advanced scientific calculations, numbers are an integral part of our daily lives. However, as we delve deeper into the realm of large numbers, a question arises: What comes after a trillion?

1. The Journey to a Trillion:

To understand what comes after a trillion, we must first appreciate the significance of reaching such colossal numerical values. The journey begins with a review of the metric prefixes used to denote powers of 10. From thousands to millions, billions, and trillions, each step represents a tenfold increase in quantity. Tracing this progression provides the foundation for comprehending the mind-boggling magnitudes that lie beyond.

2. Quadrillions and Quintillions:

Once we grasp the concept of a trillion, the natural progression leads us to explore numbers like quadrillions and quintillions. These astronomical figures find applications in various scientific fields, from astronomy to economics. Examining real-world examples helps to contextualize the enormity of these numbers and highlights their importance in understanding the vastness of our universe and global economies.

3. Beyond Human Comprehension: Googols and Googolplex:

As we venture further into the unfathomable realm of numbers, we encounter terms like “googol” and “googolplex.” Coined by mathematician Edward Kasner, these terms represent numbers so colossal that they surpass the capacity of the human mind to truly grasp. Delving into the theoretical aspects of these numbers offers insights into the limits of our numerical comprehension and the sheer boundlessness of mathematical possibilities.

4. Infinite Realms: Aleph Numbers and Beyond:

Beyond finite numbers lie the infinite realms of mathematics. Aleph numbers, introduced by Georg Cantor, open the door to understanding different sizes of infinity. Exploring the concept of the continuum hypothesis and the continuum of real numbers provides a glimpse into the philosophical and mathematical questions surrounding the nature of infinity.

5. The Mathematical Cosmos: Graham’s Number:

Graham’s number, a number so large that it exceeds any practical value in the physical universe, introduces us to the outer limits of mathematical exploration. Conceived in the realm of combinatorics, this number pushes the boundaries of what is expressible and computable, challenging our understanding of what it means to quantify the infinite.

6. Theoretical Limits: Ackermann Function and TREE(3):

Beyond Graham’s number, we encounter mathematical constructs like the Ackermann function and TREE(3). These functions stretch the limits of computability and demonstrate the theoretical boundaries of mathematical exploration. Examining the properties and significance of these functions sheds light on the nature of mathematical inquiry at the fringes of human comprehension.

7. Practical Applications: Large Numbers in Science and Technology:

While some of these astronomical numbers may seem purely theoretical, they find practical applications in diverse fields such as computer science, cryptography, and cosmology. Exploring how these large numbers are employed in real-world scenarios provides a bridge between the theoretical and the tangible, showcasing the relevance of these mathematical concepts in our technologically advanced world.

8. The Philosophical Implications: Can We Grasp Infinity?

As we navigate the realms of ever-increasing numbers, we confront the philosophical question of whether the human mind can truly grasp the concept of infinity. Drawing on insights from philosophy, psychology, and cognitive science, we explore the limits of human understanding and the challenges posed by the infinite.

9. Beyond Numbers: Hyperoperations and Transfinite Arithmetic:

In the pursuit of understanding what comes after a trillion, we delve into hyperoperations and transfinite arithmetic. These concepts extend the traditional operations of addition, multiplication, and exponentiation into uncharted territory, revealing the richness of mathematical structures that exist beyond conventional numerical frameworks.

10. The Future of Numbers: Speculations and Possibilities:

As technology advances and our understanding of mathematics evolves, what might the future hold for the exploration of numbers? Speculating on the possibilities of new mathematical discoveries and the potential for even larger numbers challenges us to envision the frontiers of mathematical inquiry that lie ahead.

Conclusion:

In our journey beyond a trillion, we have traversed the vast and incomprehensible landscapes of numbers. From the familiar realms of thousands and millions to the mind-bending expanses of googols, infinities, and beyond, the world of numbers is a testament to the limitless nature of mathematical exploration. As we stand on the precipice of the unknown, the quest to understand what comes after a trillion continues, propelling us into the boundless realms of mathematical discovery and innovation.

Continue Reading

Trending

Copyright © 2022 webinvogue.com. All rights reserved.